Set up onboarding, promotions and separation settings
यह कंटेंट अभी तक आपकी भाषा में उपलब्ध नहीं है।
Settings › Employee Lifecycle holds the settings of three modules: Onboarding Tasks (checklists for new hires), Lifecycle (promotions, transfers and role changes) and Separation (offboarding and exit checklists). The Onboarding and Separation tabs also hold the checklist templates. Of the settings, only the onboarding start settings change anything today; this page says what each one does and what to expect.
Open the Employee Lifecycle settings
Section titled “Open the Employee Lifecycle settings”-
Select Settings in the menu bar. If you’re an Admin, turn on admin mode first: select your name at the top right, then Elevate to Admin.
-
Open Employee Lifecycle, then the Onboarding, Promotions & Transfers or Separation tab.
-
Change what you need, then select Save changes in the bar at the bottom of the page.
Each tab starts with its module’s switch: Onboarding Tasks is on, Lifecycle is on or Separation is on. The three modules are off after setup; see Turn modules on and off. Reset to defaults, at the bottom of each tab, puts the built-in values back into the form, and nothing changes until you save.
HR Admins can open and save all three tabs without admin mode. Each tab’s save permission is Manage settings in Onboarding, Lifecycle or Separation. The template lists show only to people whose role has Manage templates in Onboarding or Separation.
Onboarding
Section titled “Onboarding”An onboarding is a checklist of tasks for a new hire, created from a template. Each task is assigned to the employee, their manager, HR or IT and is due a number of days after the start date.
Onboarding templates
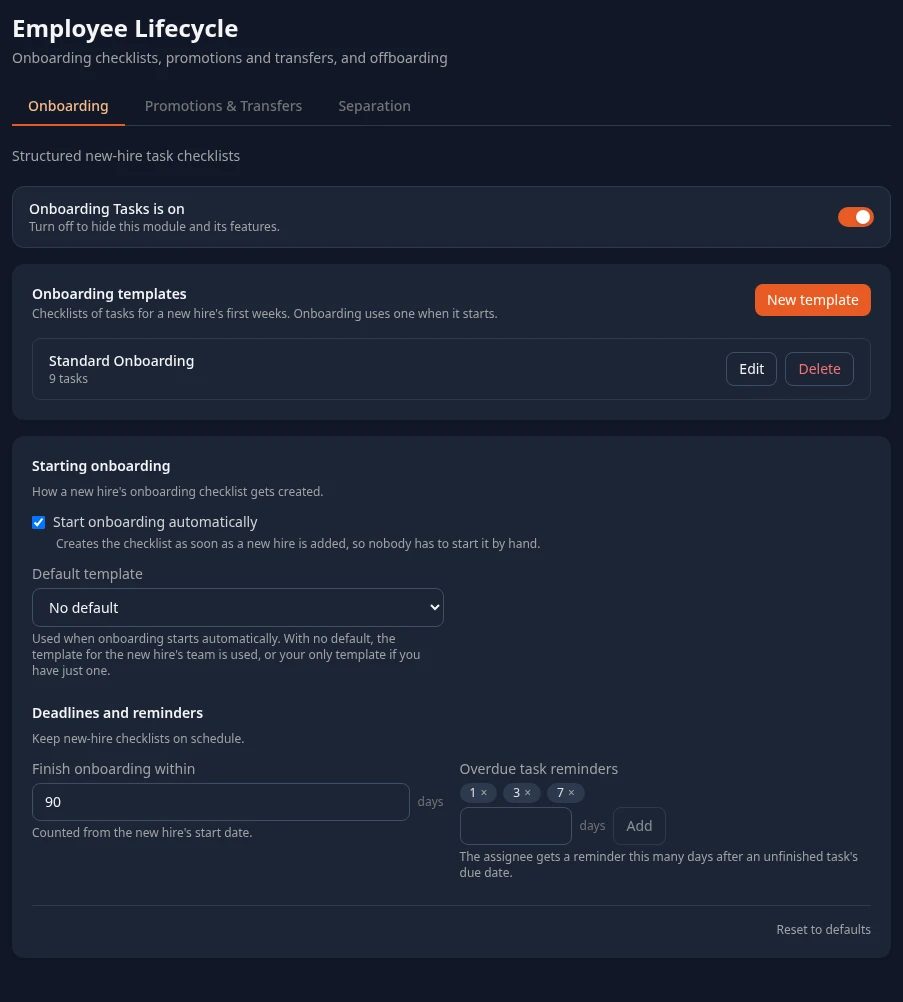
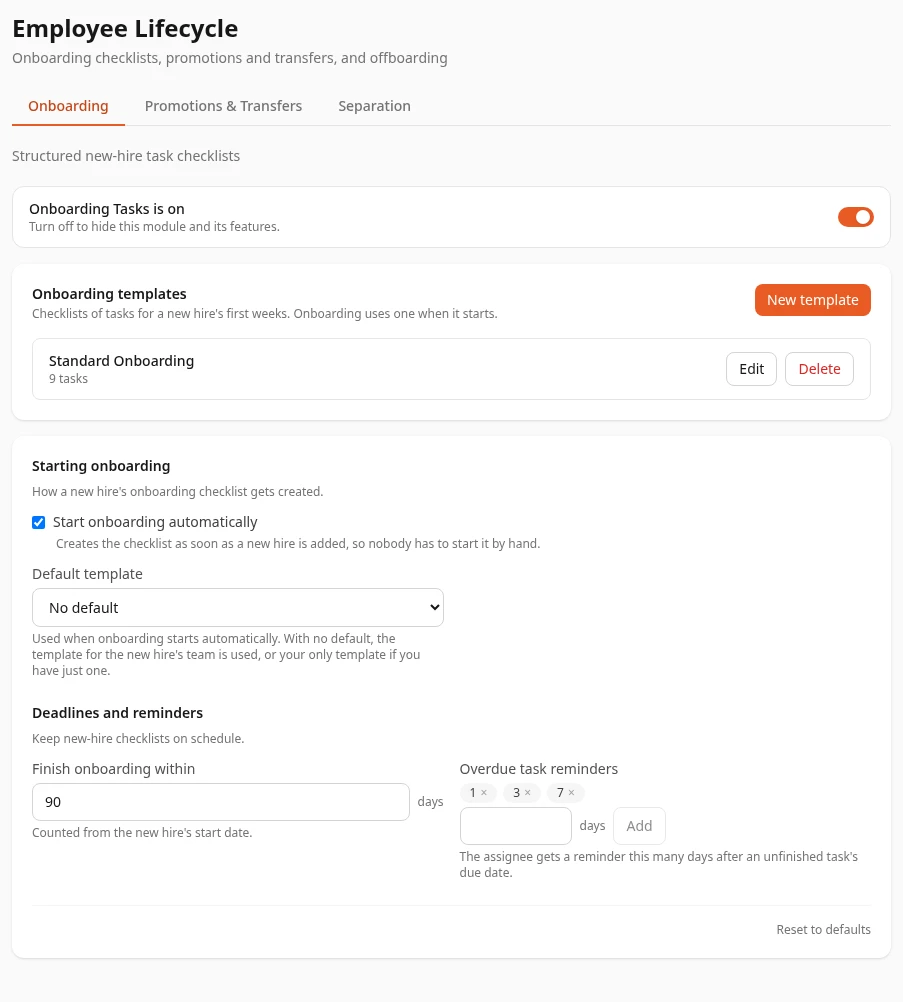
Section titled “Onboarding templates”Onboarding templates, at the top of the tab, lists your templates with their number of tasks. The one chosen as Default template is marked Default.
-
Select New template, or Edit next to a template.
-
Enter a Name and, if you like, a Description. Choose a Team to use the template for new hires in that team when there’s no default template, or leave Any team.
-
Under Tasks, fill in each task: the Task itself, Assigned to (The employee, Their manager, HR or IT), Due in days after the start date (a negative number for days before), Required, and optional Details. Use Add task for more tasks, the arrows to change their order and × to remove one.
-
Select Save template. Templates save on their own: the Save changes bar is only for the settings further down.
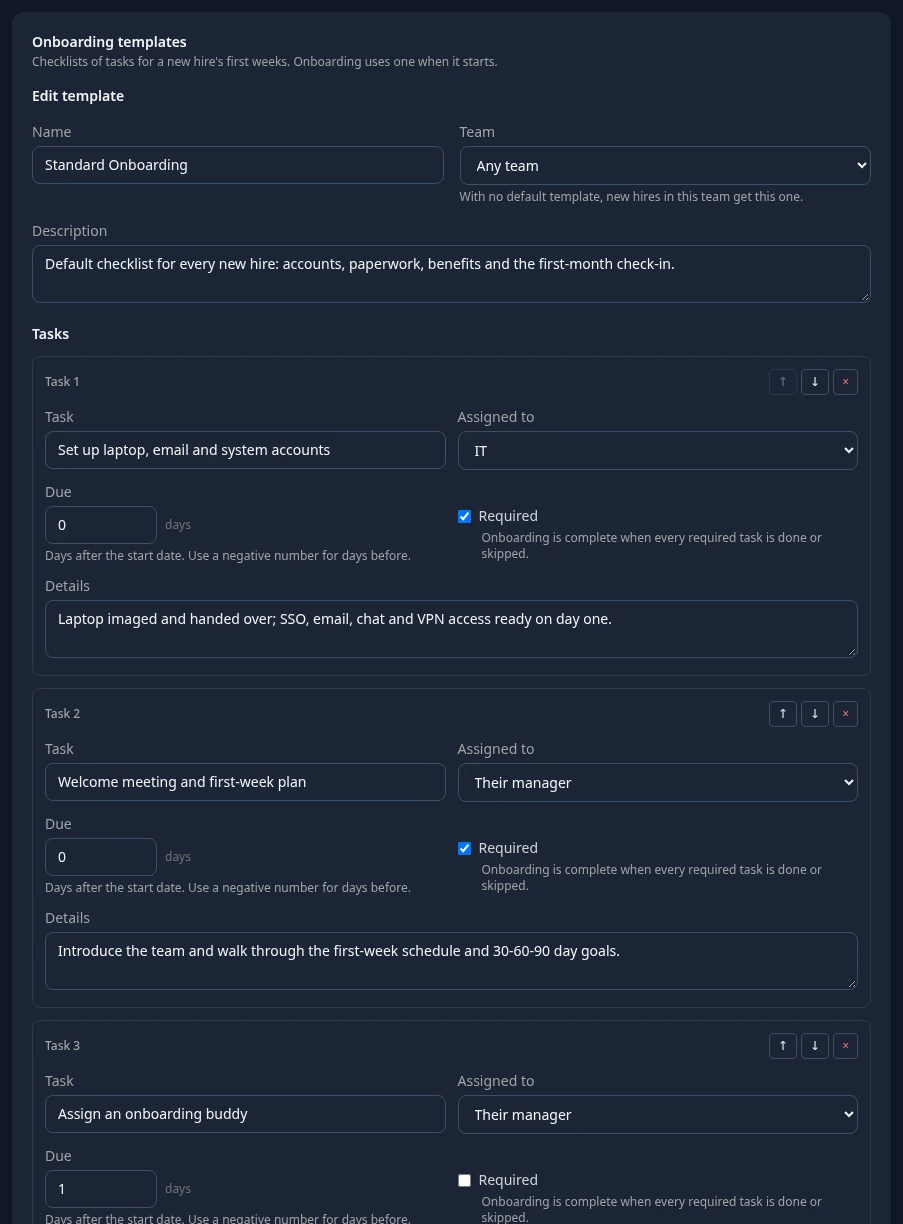
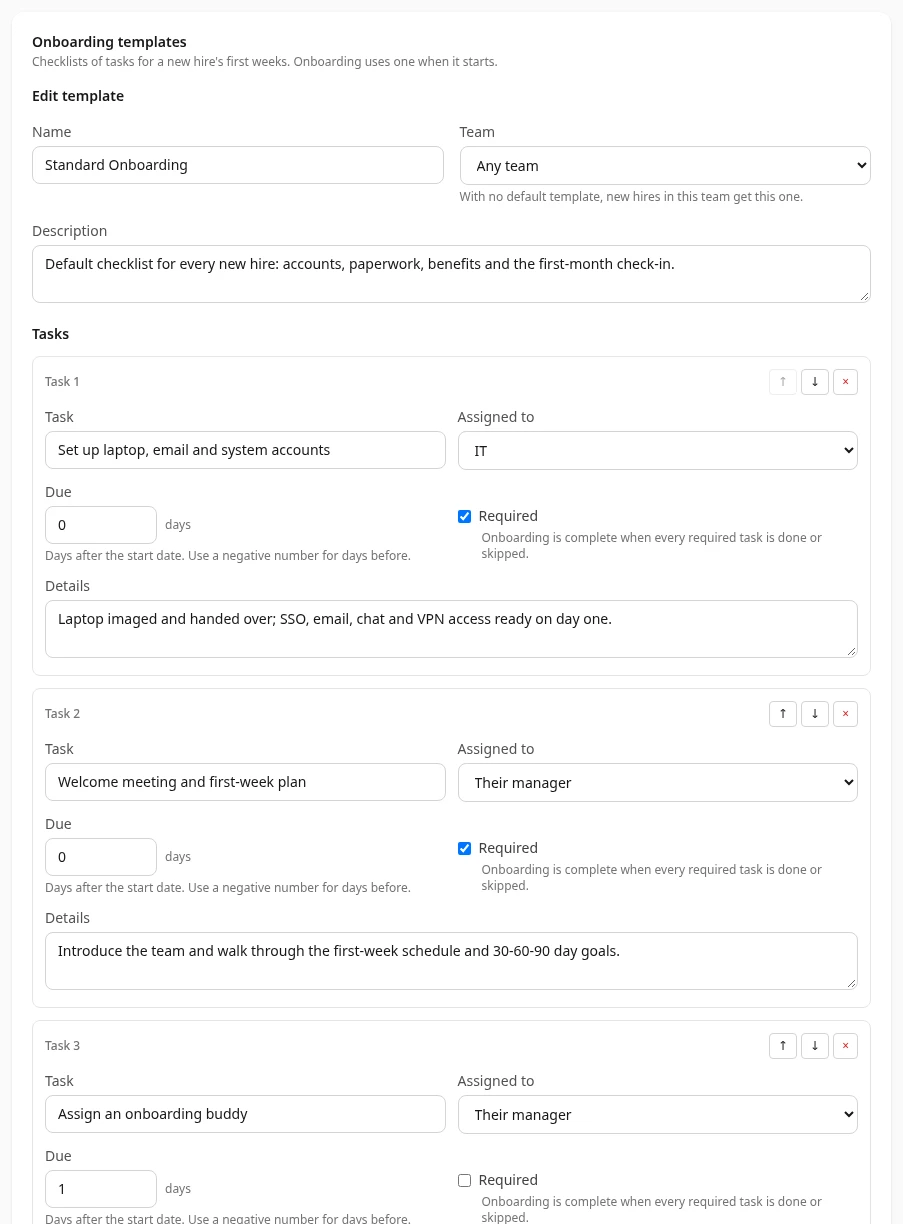
A template needs a name and at least one task, and every task needs a title. A template holds up to 50 tasks and a workspace up to 50 onboarding templates. A task can be due up to 365 days before or after the start date. If something is missing, the form lists it under Fix these before saving:.
Changing a template doesn’t change onboardings that already started. To delete a template, select Delete next to it and confirm; onboardings that already started keep their tasks. If it was the Default template, choose another one under Starting onboarding, or onboarding won’t start automatically.
Onboarding settings
Section titled “Onboarding settings”| Setting | What it does | Default |
|---|---|---|
| Start onboarding automatically | Creates a new hire’s checklist when they’re invited, or when they first sign in through single sign-on. Hiring a candidate in Hiring starts onboarding even when this is off. | On |
| Default template | The template automatic starts use. With No default, an invited person gets the template for their team, or your only template if you have just one. A first sign-in through single sign-on only uses the default, or your only template. | No default |
| Finish onboarding within | Saved but not used yet. | 90 days |
| Overdue task reminders | Saved but not used yet: no reminders are sent. | 1, 3 and 7 days |
If the default template was deleted or has no tasks, automatic starts are skipped without a message. The picker warns about both.
Workspaces with sample data have one template, Standard Onboarding. A workspace that finishes setup without sample data starts with Standard onboarding and an exit checklist, Standard exit checklist, for you to edit or delete. Workspaces that went live before these starters existed have none, and the list reads No onboarding templates yet. Create one so onboarding can start for new hires.
Promotions & Transfers
Section titled “Promotions & Transfers”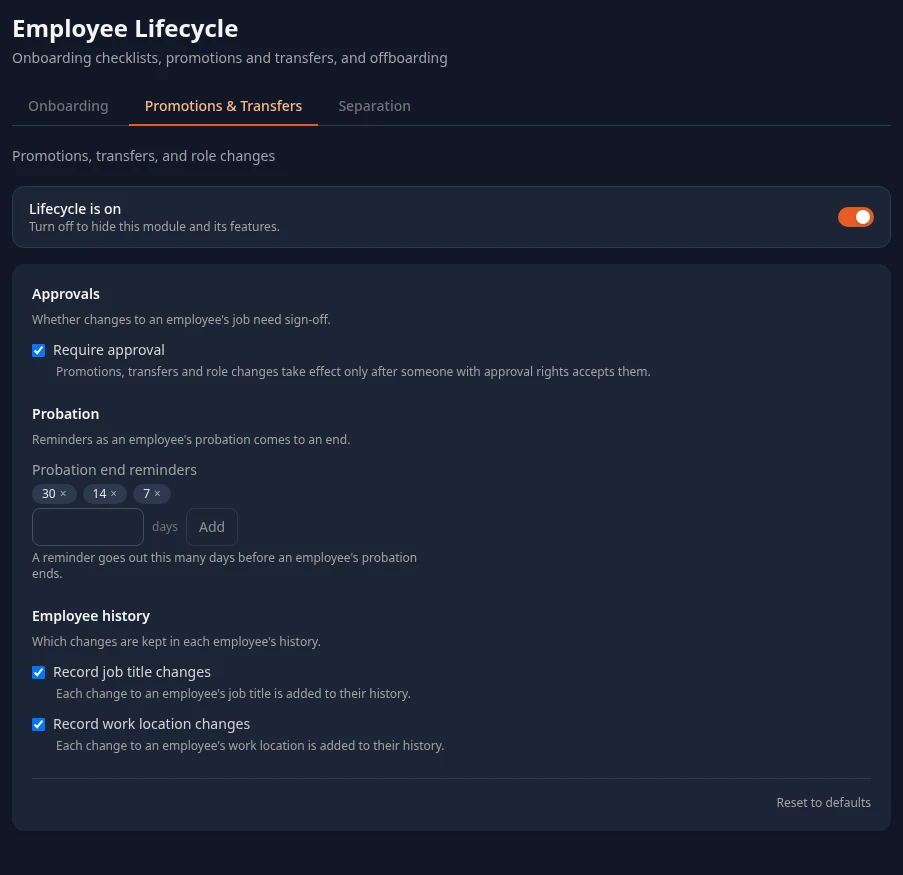
| Setting | What it would do | Default |
|---|---|---|
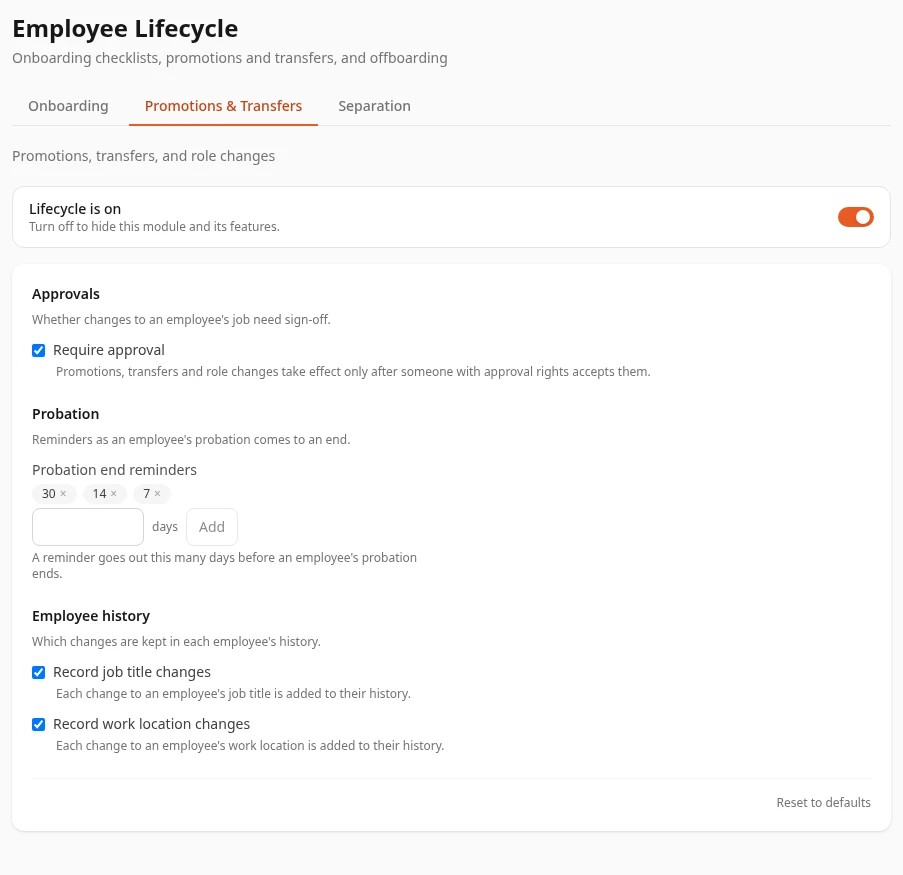
| Require approval | Promotions, transfers and role changes take effect only after someone approves them. | On |
| Probation end reminders | Reminders before an employee’s probation ends. | 30, 14 and 7 days |
| Record job title changes and Record work location changes | Which changes are added to each employee’s history. | Both on |
None of these settings has an effect yet. Every promotion, transfer or role change waits for someone whose role has Approve in Lifecycle, at a reach that covers the employee, even with Require approval off. No probation reminders are sent, and the two history switches don’t change what’s recorded.
Separation
Section titled “Separation”A separation is an employee’s offboarding: an exit checklist, created from a template when HR starts the separation from the employee’s profile.
Exit checklist templates
Section titled “Exit checklist templates”Exit checklist templates, at the top of the tab, work like the onboarding templates above, with these differences:
- A task can also be assigned to Finance.
- Due counts days after the last working day, and a negative number counts days before it: -10 for a handover plan, for example.
- There’s no Team.
- A separation can’t be completed until every Required task is done or skipped.
HR can’t start a separation without an exit checklist template. Until one exists, the Initiate Separation dialog says No exit checklist templates exist yet, so a separation can’t be started. and, for people who can create templates, links to this tab.
Separation settings
Section titled “Separation settings”| Setting | What it would do | Default |
|---|---|---|
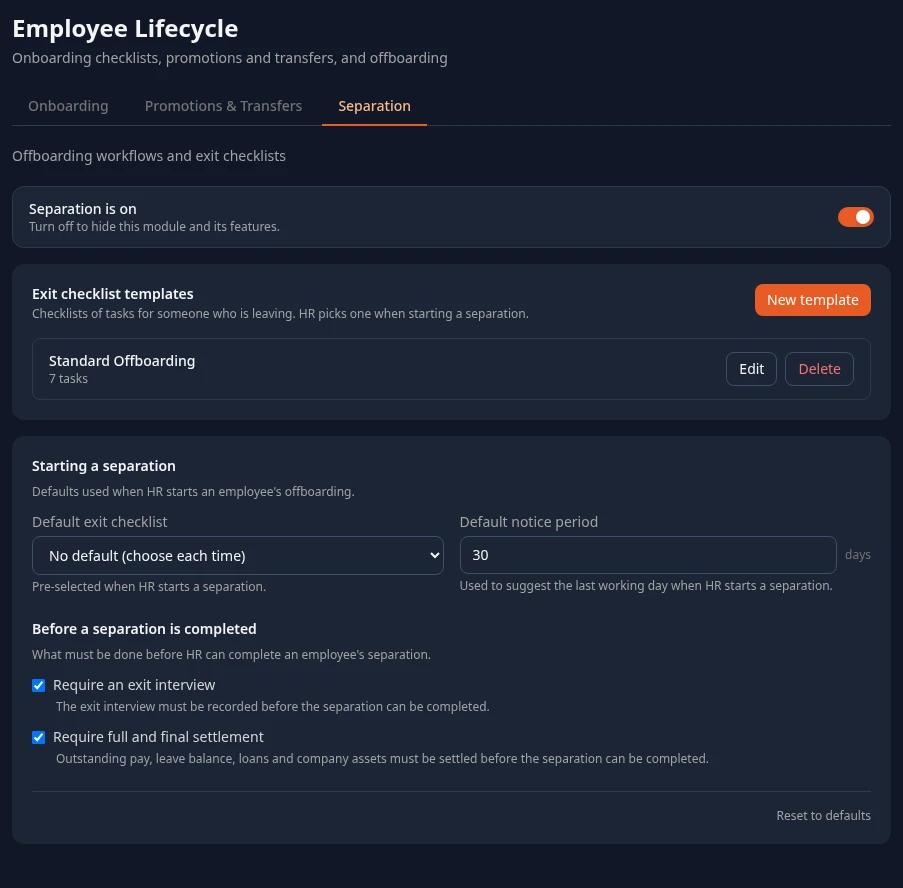
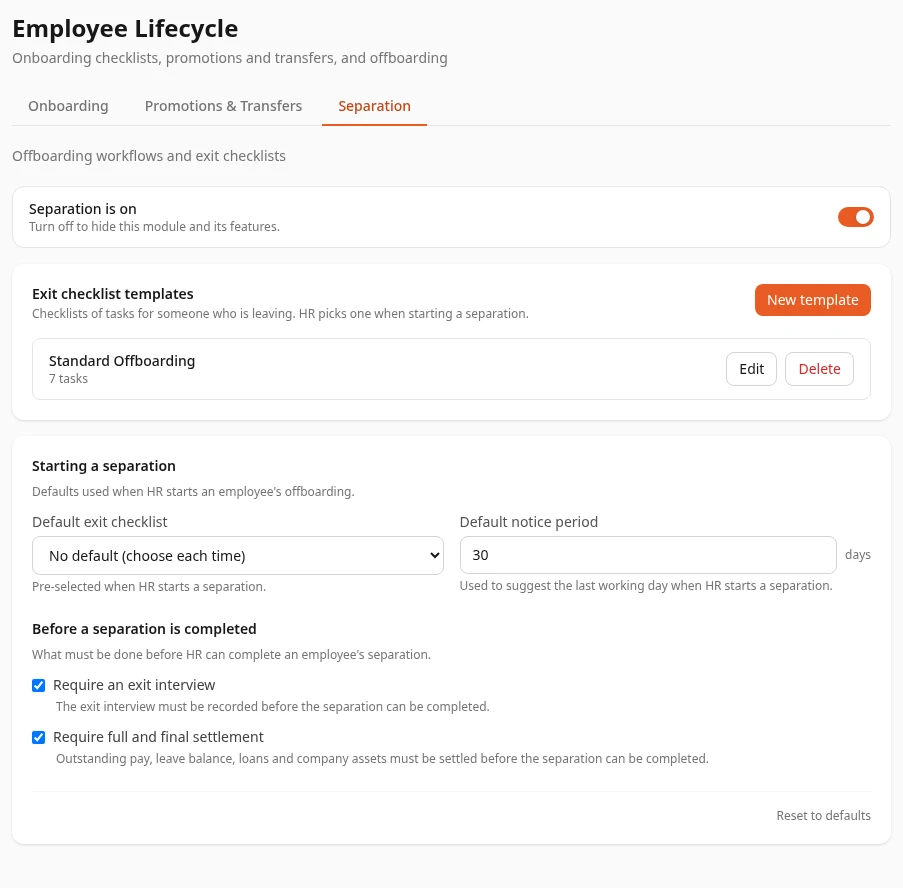
| Default exit checklist | Pre-selects a template when HR starts a separation. | No default (choose each time) |
| Default notice period | Suggests the last working day. | 30 days |
| Require an exit interview | Blocks completing the separation until the exit interview is recorded. | On |
| Require full and final settlement | Blocks completing the separation until pay, leave, loans and assets are settled. | On |
None of these settings has an effect yet. When HR starts a separation, the dialog picks the first template in the list, not your default, and suggests no last working day. A separation can be completed as soon as its required checklist tasks are done.
Can’t see this?
Section titled “Can’t see this?”- There’s no Employee Lifecycle card in Settings. If you’re an Admin, turn on admin mode. Other people need a role that can save one of its tabs: see Who sees what.
- A tab only shows a button such as Enable Separation. The module is off: select the button to turn it on.
- There’s no template list on the tab. Your role doesn’t have Manage templates in Onboarding or Separation. Admins need admin mode.
- The template picker is empty. Your workspace has no templates yet: create one under Onboarding templates or Exit checklist templates at the top of the tab.